|
|
|
In This Section:
[]
[]
[]
|
Chapter 4
|
 |
 |
|
|
|
 1.
Introduction to inking 1.
Introduction to inking
Ink is pigmented liquid, generally of a dark color. Inked lines are much more bold, distinct and definitive than pencil lines. Inking helps achieve a more
clean and professional look to your artwork. There are a variety of inking styles, all with different purposes and intentions.
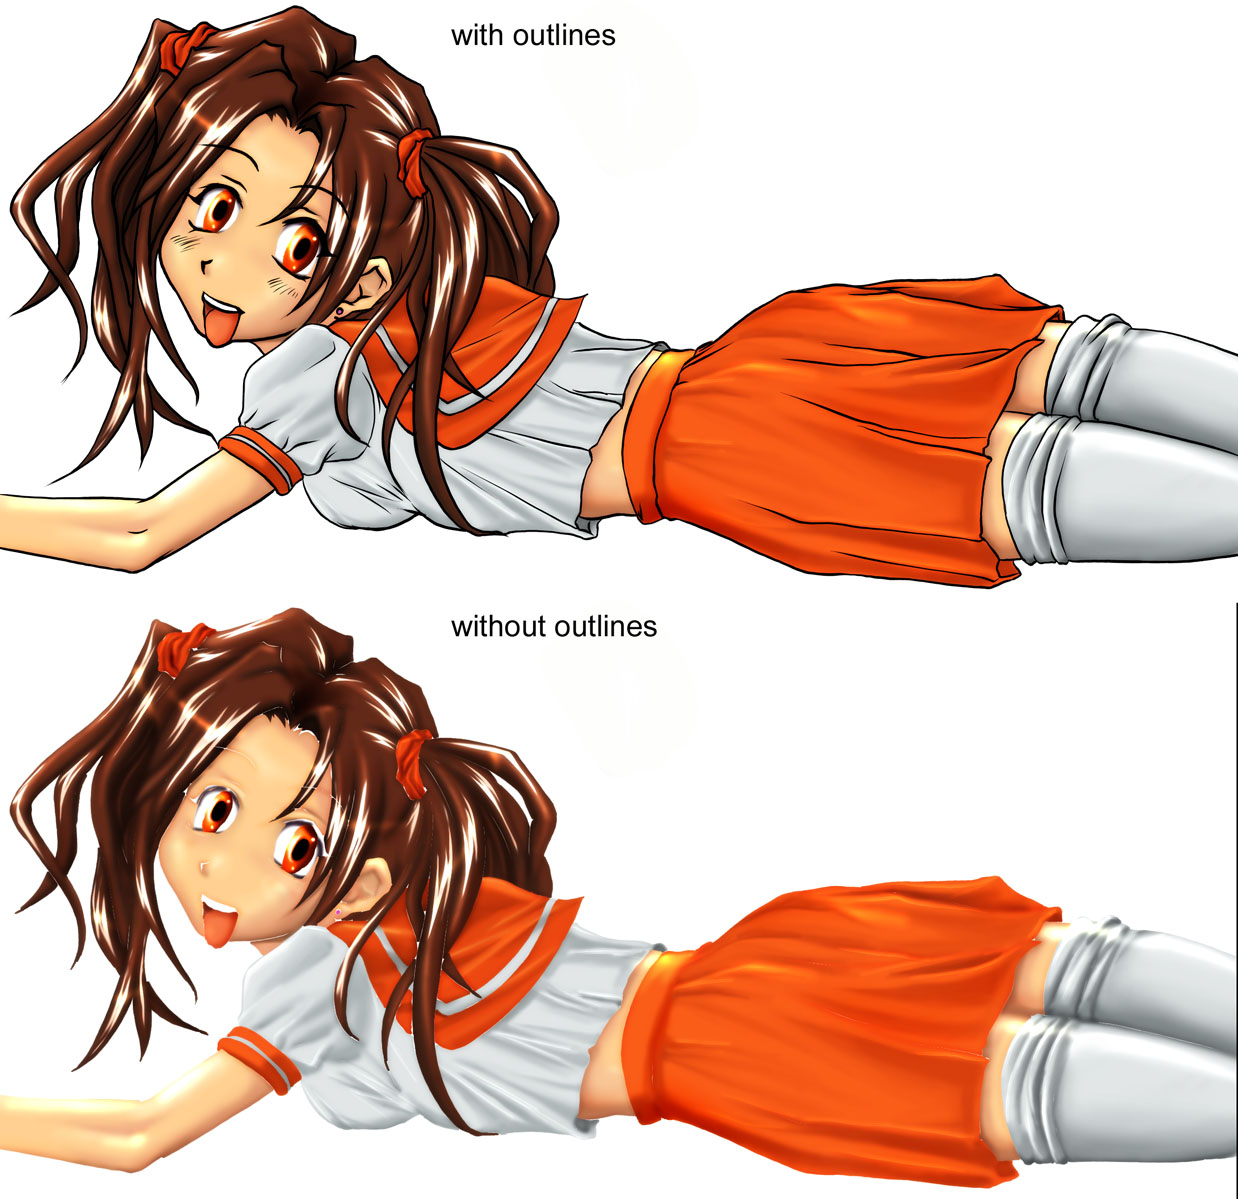
In anime style artwork, especially artwork colored cel-style, inked lines are usually contour lines, denoting the outline of the characters,
objects and the most important details contained within. For example, the line work on a
character's hand would depict the outline of the fingers, and perhaps the fingernails, but would neglect to
show shading, wrinkles, textures, or faint folds in the skin. It is up to the colors to show depth and texture.
It is possible to show shading, textures, and other definition through inking (hatching, cross-hatching, stipulation, solid black areas, etc), but unless the inked line work is
the finished product, (in other words, no color) these additional details are the responsibility of the colors. For anime style artwork, it is recommended that you avoid adding such details in your line work, unless it complements your style, or
helps you create a distinct look that you wish to achieve.
The premise behind inking is simple. Make the
lines on the image as dark and precise as possible
so that they completely contrast the paper and
therefore reproduce better when scanned or
photocopied. Inking an image also gives you a
definitive guide to follow when coloring the line
work.
As you might have guessed, inking relates more to drawing than it does to CGing, so
this section will be mostly focused on the aspects of digital inking (inking on the computer), and traditional inking for the purposes of scanning and coloring on the computer. Since it is important to know the basics of inking in order to properly ink directly on the computer, so we'll cover some of
that too.
|
|
2.
Considerations to make before inking
While inking can be an important part of the CGing process, it isn't the only way to do things. There are no hard and fast rules in art. Everything's open to interpretation and exploration. In a lot of cases, inking makes sense, but not in all. Here are some instances where you may not need to go to the trouble of inking your image.
1. You're going to paint the image. - As paintings do not
always contain distinct outlines, it's not always necessary to ink your picture. Traditional painters often use soft pencil or charcoal lines to get a rough idea of where they plan to block in colors. The outline is only there as
a guide, and is painted over as the piece progresses. In the completed image, lines are non-existent. Why go to the trouble of inking lines if you're not going to see them?
While the painted look works well with realistic style backgrounds and objects,
keep in mind that anime style characters often suffer without discernable lines.

Besides the facial details,
there's practically no outline remaining in this image.
Painting is an extremely time consuming compared to
other CGing methods.
Attention to lighting and precise coloring is required on painted images, but can have amazing
results.
2. You're not painting, but you want that "no line" look - It is extremely time consuming and difficult to make a good looking picture where the characters and objects have no discernable outlines. These pictures rely solely on traditional painting techniques and color theory to show an objects edge without actually drawing an edge
on the object. Unless you know what you're doing, the "no line" look is a quick way to make a really horrible image.

Anime style artwork is
usually dependent on an outline. Without the
outline, the picture
can fall apart leaving only
blobs of color. This rule especially applies to
the facial details.
That's why it's important to either have a defined outline or
very
good traditional painting technique.
Click on the image for a full size comparison
between the line and no line version.
3. Your pencil lines are sharp, clean, and dark. - Inked lines have a consistent black color that's easy to scan and reproduce with minimal cleanup. If your clean pencil lines
fall under this category, you may be able to save yourself some time, and forego the inking process. Just scan and work from your clean pencil lines.

There's really nothing inking can do for this
picture, besides sharpening up some of the rough lines.
4. You want rough looking pencil lines - Sometimes style demands it, but I wouldn't suggest it. Images with pencil lines can have interesting looking features when used in various CGing techniques, but they're infinitely harder to work with
than inked lines, and they generally don't look very professional.

Colored rough line art can
have personality and charm,
but will lack the polished feel of clean or inked line work.
|
3.
Traditional and Digital Inking Tools
The tools you use for inking are very important. Anything that produces a dark or black line, from a ballpoint pen to a paintbrush can be used for inking, but certain tools will excel more in the inking field than others.
Keeping scanning and standard CGing techniques in mind, we want to choose tools that will best suit this operation. The most commonly used tools for inking are pens, brushes, nibs, and of course, a variety of digital tools.
Make sure that your inking tool of choice is able to produce a distinctly dark line, with a variety of different line shapes, ranging from thick to thin, large to small. For best results, the lines should be smooth and precise.
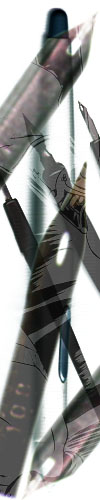
Traditional Inking
Tools
Traditional inking doesn't quite reach the same level of quality that digital inking can, but it's still
very functional, and depending on your preferences and needs, might be your method of choice. When traditionally inking, your tool must allow you to erase underlying pencil lines without smudging, and
produce lines that are large and dark enough to be picked up by the scanner. Traditional tools of choice are pens, brushes, and nibs - choose one that best suits your style and technique. Keep in mind that not just any pen or brush will do. For example, ballpoint pens and sharpie markers may produce distinct, black lines, but they smudge, look thick and blocky, and scan badly. Avoid tools that are intended for writing rather than drawing!
-Pens-
There are a lot of different types of pens out on the market, but only a select few brands are
suitable for inking. Use pens that are only intended for drawing. Make sure that you select a type of pen that is waterproof, lightfast, smudge proof, and fade proof. Ballpoints, felt tipped, pigmented or brush-sized are all good types, and can come in many different sizes, colors, and
thickness. Smaller sizes are best for lines and detail, and larger sizes are good for filling in areas. Pens are best used for inking only small details (eyes, etc), but can be used as your primary inking tool.
Sakura Pigma Micron pens are good for detail work and lines that require a lot of precision. The advantage of technical pens like the Sakura
Pigma Micron pens is that they come in a variety of colors and sizes,
are quick to dry, smear proof, waterproof, fade proof, and will not bleed on even the thinnest drawing paper. The pens with the smaller tips (generally they're the ones with number like .01, .03, and .05) are the best pens for inking pencil lines. Unfortunately, the tips dry and break incredibly quickly - you'll find yourself replacing these on a
monthly basis. The line quality is scratchy, and the ink doesn't flow fast enough, so lines must be drawn slowly for best results. When used on clean, bright white paper with a smooth grain, and scanned properly, Sakura pens will give good results. Otherwise, the line quality will leave something to be desired.

Sakura Pigma Micron:
Inexpensive and great for thin precise lines.

Sakura Microperm: Like the
Micron, but designed for metal, glass, fabric,
and wood.
Don't make the mistake of buying this pen over
the Micron; this guy isn't designed for graphic
art.

Staedtler Pigment Liner:
Just like the Pigma Micron, only made by a
different company in Germany.
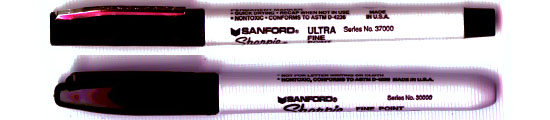
Sharpie Pens: Avoid!
Sharpies produce thick black lines, but they bleed into
paper, and their
lines fade and turn yellow with time. They're good pens to write dates on the outside
of Zip-Lock
freezer bags, or addresses packages
with, but I wouldn't suggest them for
artwork.

Rotring Art Pens: This faux
nib pen produces thin lines like the Micron
pens.
However, the ink isn't waterproof and can
easily take a blotchy trip all over your
artwork
after hitching a ride on the palm of your hand. The pen
requires constant cleaning or it'll clog.
The replaceable ink cartridges also have a
tendency to dry up quickly.
-Brushes-
Brushes are excellent tools for varying line
thickness. They provide a wide variety of very thin to very thick lines, all with the same brush! They're also capable of producing smooth flowing lines that scan
and reproduce particularly well. Brushes have a steep learning curve, and take a great deal of practice to master, but are the choice tool of many professional inkers. The brand name I hear everyone in the comics and cartooning industry recommending is the Windsor & Newton series 7 sable brushes. These are the best brushes that money can buy, but
cost around $20 a brush (and that doesn't even include the ink!). It's extremely important to make sure that the brush is cleaned after every use or else it will be ruined.

Brushes are great if
you have the time and patience
to learn how to properly use them.
-Nibs-
Designed for drawing, illustrating, and calligraphy, nib pens have a flexible metal tip or nib that you can use to ink your picture. The amount of ink applied to
a page is controlled by the amount of pressure excerpted on the tip, and thus with the nib you can vary the thickness of your lines with pressure. Nibs come in a variety of sizes and hardness, from soft to hard, small to large. It creates lines that are precise and sharp, straight and strong.
The lifespan of a nib is generally longer than a
brush.

Nib...
they come in various sizes and shapes and
usually cost less than $1 each,
so you can buy a bunch and find one that best
suits you.
A softer nib is best for drawing, as it allows for greatest variety of thick to thin lines.
For good results, try the 102 Crow Quill and the 106
Hawk Quill nibs produced by Speedball/Hunt.
Nibs are capable of producing beautiful line work, and of the three types of traditional tools, the nib is the tool I recommend the most, but they are not without their problems. Like brushes, nibs take a lot of time to master.
Consider practicing on blank sheets of paper
until you're comfortable with your ability
before inking directly over your pencils.

Nibs like the 102 Crow Quill are excellent at
producing varying thick and thin lines.
Incase you're
not familiar with nibs, the
metal part on the left is the nib, the blackish
brown plastic is the nib holder.
Nibs will give out a lot of ink, and tend to scratch deeply into the paper. As the point is dragged across your paper, the metal tip may tear small holes into it, causing blobs of ink to spill from your pen and soak into your paper. To minimize this, use a heavy and smooth paper when inking with nib pens. In general, sketch paper has a rough tooth that nibs will rip up - avoid inking on this type of paper!
In addition, ink from nibs takes
longer to dry than brushes or pens, so be careful not to rub your hand over freshly applied ink, or it will smudge badly.
The worst thing about nibs is that they will leak droplets of ink if filled too full. These types of mistakes can ruin a picture. Unless you're extremely lucky, or have a very good handle on the technique of inking, you're bound to accidentally drip ink onto a beautiful piece of pencil work. This blob of ink will soak into the paper and spread, causing irreparable damage to your picture. This can happen to even the most skilled professionals and depending on the severity, you'll either have to fix the problem with white out or opaque gouache, or you'll have to start your drawing over from scratch.
Make sure to wash your nibs with soap and water after every session, or else the ink will harden and dry in it,
causing the nib to rust. One other thing to note about brushes and nibs:
for goodness sake don't leave them in the water for extended periods of time. Nibs will rust and brushes will loose their
tips!
|
|
Digital inking
Tools
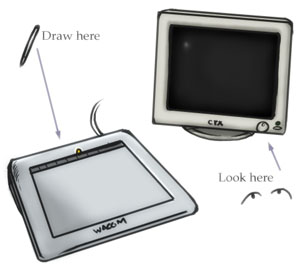 Digital inking is like drawing directly onto your computer monitor, via the tablet and stylus. Drawing onto a slick plastic tablet with a slick plastic tipped pen while looking up at your monitor rather than down at your paper can take
some time to get comfortable with. But the results can be well worth the time spent!
I've read several accounts of professional artists who have switched over to digital inking tools in recent years due to the great advantages it has over traditional inking tools. Digital inking is like drawing directly onto your computer monitor, via the tablet and stylus. Drawing onto a slick plastic tablet with a slick plastic tipped pen while looking up at your monitor rather than down at your paper can take
some time to get comfortable with. But the results can be well worth the time spent!
I've read several accounts of professional artists who have switched over to digital inking tools in recent years due to the great advantages it has over traditional inking tools.
Clean, smooth lines, and high levels of detail can be achieved with digital inking. Paper size and resolution can be as large as you desire. The highest level of detail and quality is possible, as the zoom tool allows you to display small sections of your image so that they take up the full size of your computer screen. From there, you can draw small intricate details while still working big.
With digital inking, there are no art tools to buy or replace (with the exception of the art program itself), and no cleanup is necessary. All you need to ink your image, from paper to supplies, is self-contained, and you can put it all away by simply closing the program. Likewise, there are no messy ink blob accidents waiting to happen, and mistakes can be undone!
Unfortunately, inking on the computer can be very time consuming, due to the increased size of the image. When you scan in your artwork at around
300 DPI, you're creating an image that can appear anywhere from four to five screen lengths tall, and a couple of screens wide (and possibly larger!). Looking at it this image is like looking at your piece of paper through a magnifying glass. What you get on screen is many times larger than the piece of paper is in real life.
Digital inking can also become confusing at times, because you'll be looking at parts of the image, rather than the full image, unless you zoom out all the way. If your pencil lines are loose and open to interpretation you may end up inking lines that you didn't intend to ink, or rendering objects out of proportion. I can't even begin to tell you how many times I've had to reduce/enlarge various body parts to get everything in proper proportion when drawing or inking on the computer.
There are a number of art programs
on the market (Corel Painter, Adobe Photoshop, Paint Shop Pro, Adobe Illustrator, and Corel Xara, etc),
but the only one I would recommend to you for
digital inking is Corel Painter. This is because Painter is designed with tools that are meant to work just like traditional media. Other programs, such as Photoshop, were designed with digital photo manipulation, type setting, and editing in mind, rather than drawing.
 -Painter - Digital
Inking -Painter - Digital
Inking
Of all the art programs currently on the market that can be used for digital inking, Painter is without a doubt, the best. Using your graphics tablet in conjunction with Corel Painter, you can do everything a traditional brush, nib, or technical pen is capable of, and much more. If you want to produce high quality, digitally inked pictures,
this is the program I recommend. It has a wide variety of excellent inking tools that can produce smooth bold lines. The lines are anti-aliased, and change from thick to thin with just the slightest pressure from your stylus. Pressure sensitivity is of course customizable to suit your needs.
There's no other art program that offers such a wide variety of tools (practically any artist tool that you may have ever wanted to try, chalk, pencil, watercolor, ink, palette knife, charcoal... the list goes on and on) with such a high level of customization (tools may be tweaked and adapted to create new tools, and perform specific tasks; windows can be rearranged; and all settings can be saved for future use).

Sharp tapered
lines. Painter's Scratchboard tool is perfect for
digital inking.
 -Photoshop or Paint shop Pro - Digital Inking -Photoshop or Paint shop Pro - Digital Inking
Photoshop is a great application for coloring and photo editing, but it should be avoided when it comes to inking. Photoshop was never designed with natural media tools in mind so trying to simulate them within the program is very tough indeed. Even using a pressure sensitive tablet doesn't help the situation. Photoshop's paintbrush, airbrush and pencil tools simply aren't capable of producing the smooth consistent lines associated with traditional inking. The pencil tool creates lines that are jagged and blocky, not anti-aliased, and the airbrush tool creates lines that are far too soft and feathery. The paintbrush can create lines of decent quality, but the tool is hard to control, produces jagged edges, and doesn't taper off very well.
If you have no other choice, and you want to try digital inking without having to purchase Painter then it is possible to get some functionality out of Photoshop. As I mentioned above Photoshop was never designed with inking in mind, but the best makeshift tool for the job would be the paintbrush. It produces a somewhat smooth, even flowing, line if you're very patient and meticulous... otherwise you'll get clumpy black blobs.

Lines aren't as sharp or
thin as Painter's but if you have no other
choice, Photoshop can produce a fairly decent
line.
|
|
|
|
|
|